According to the author's understanding, many friends around have complained about the slowness of the computer, and more or less of them have heard that the machine will be faster after replacing the SSD. However, for non-computer players who have no actual experience, they do not understand. How to buy or do not understand the installation and become the main obstacle they have not embraced solid-state drives for a long time. This time, a computer-based upgrade tutorial was written to help relatives upgrade their SSDs. This method has already installed the system. The common computer used is also applicable. 618 will soon be on the way to make obstacles difficult. I hope this article can help netizens!
The Pokecot M6S Plus 128G SSD was the first two months of planning to help a friend install the machine, but then for some reason the machine was not installed, so this plate has been left for me, just a few days ago relatives Tell me that his new book is too slow, just to help him change the SSD. However, now the price of 256G SSDs has dropped so fiercely that they have to sigh.
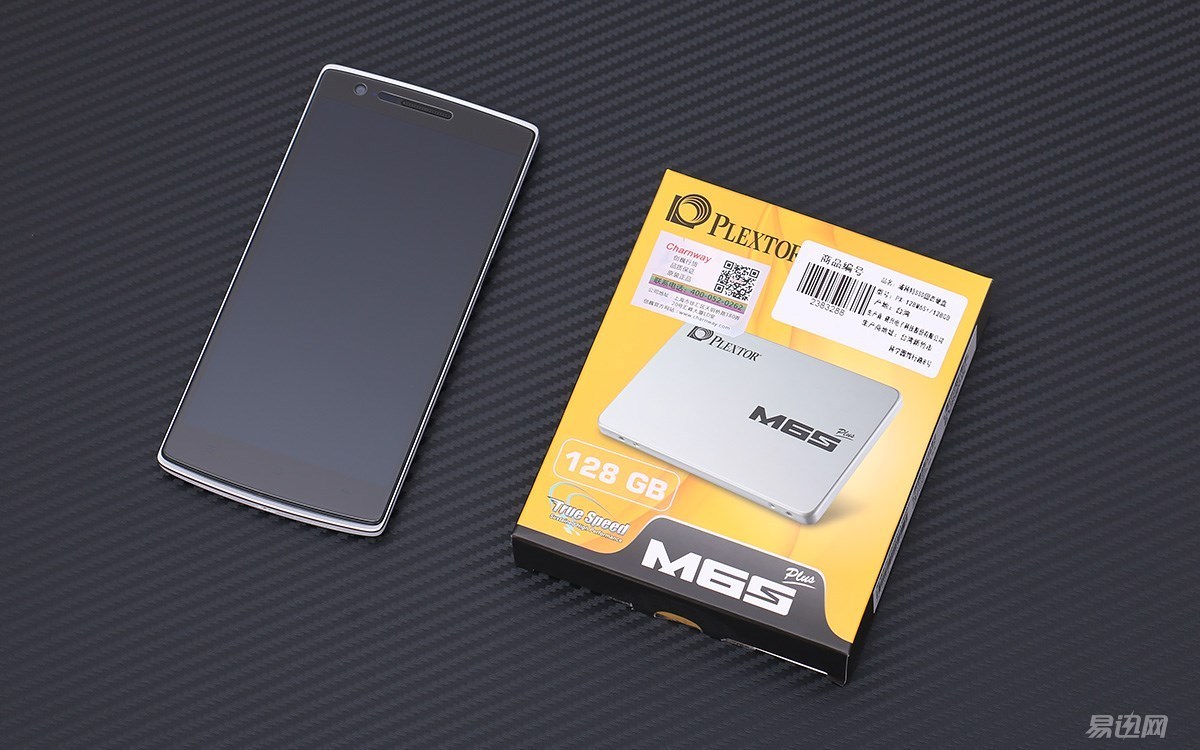
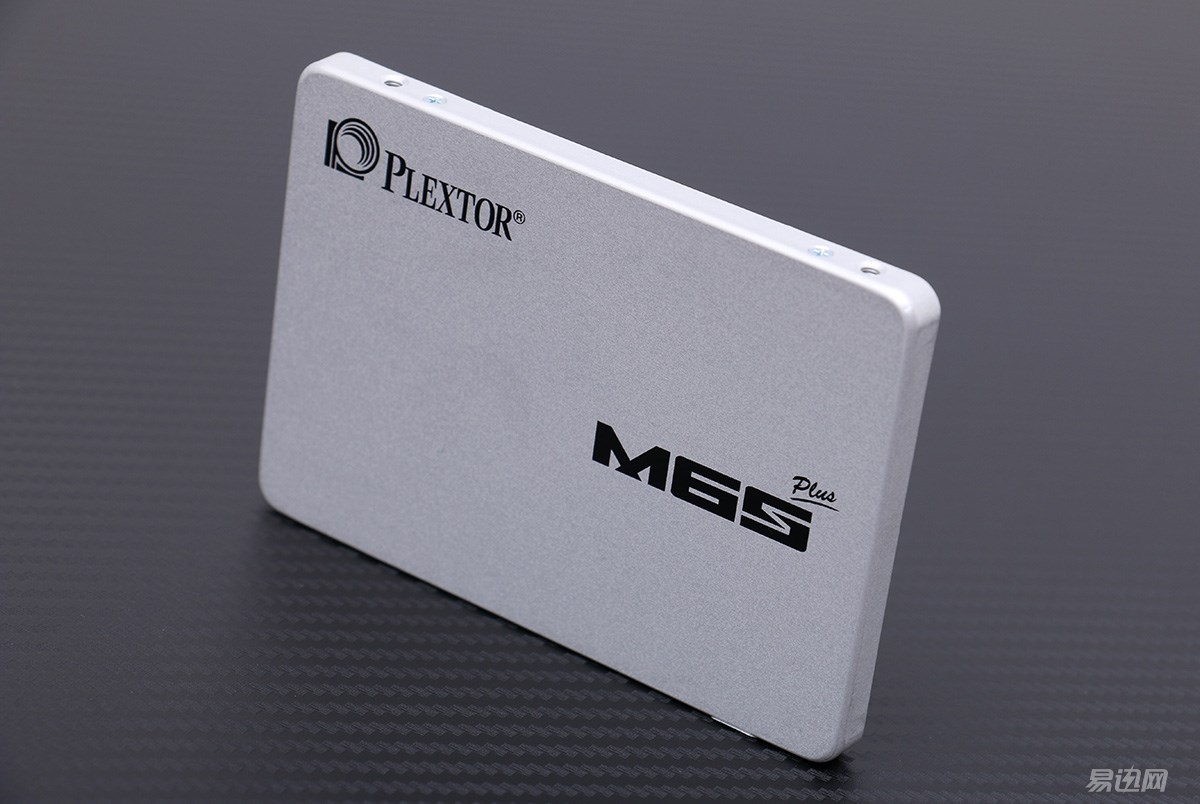
Plextor M6S Plus has been on the market for four months and has been used to replace the previous M6S. The packaging style has hardly changed. The main control is also the Marvell 88SS9188. The flash memory is replaced by the TOSHIBA A19nm Toggle MLC from the M6S to the current TOSHIBA 15nm Toggle. MLC particles.
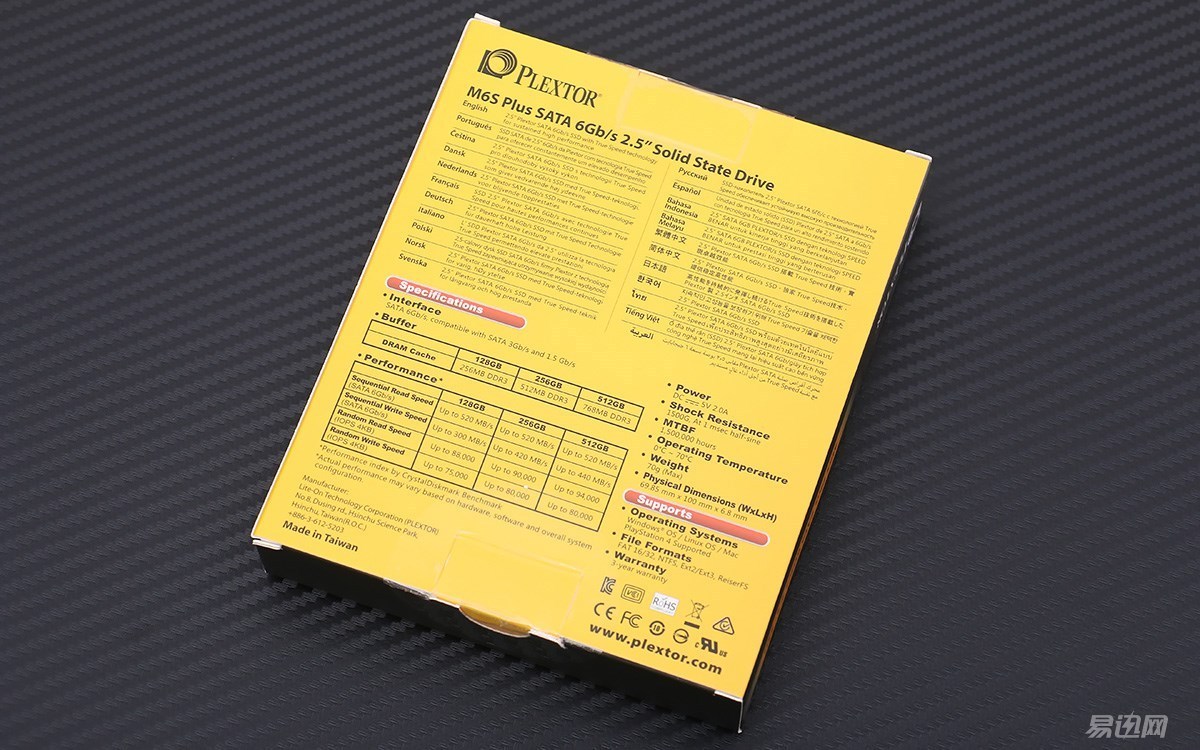
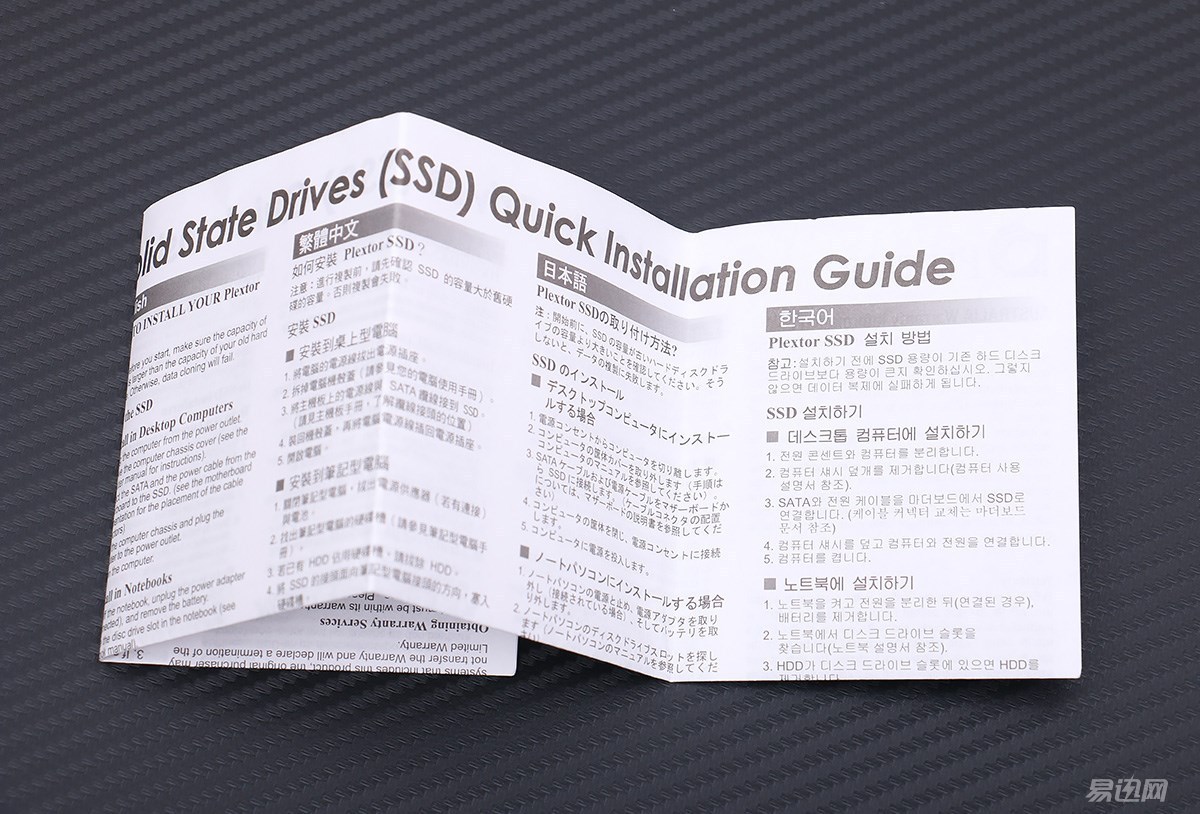
There is a sealed seal at the opening of the box. The SSD in the box is not packaged in anti-static bags, and there are no accessories such as brackets and data cables. Apart from the hard disk, there is only one quick installation guide, but this is for me. There is no use for it.
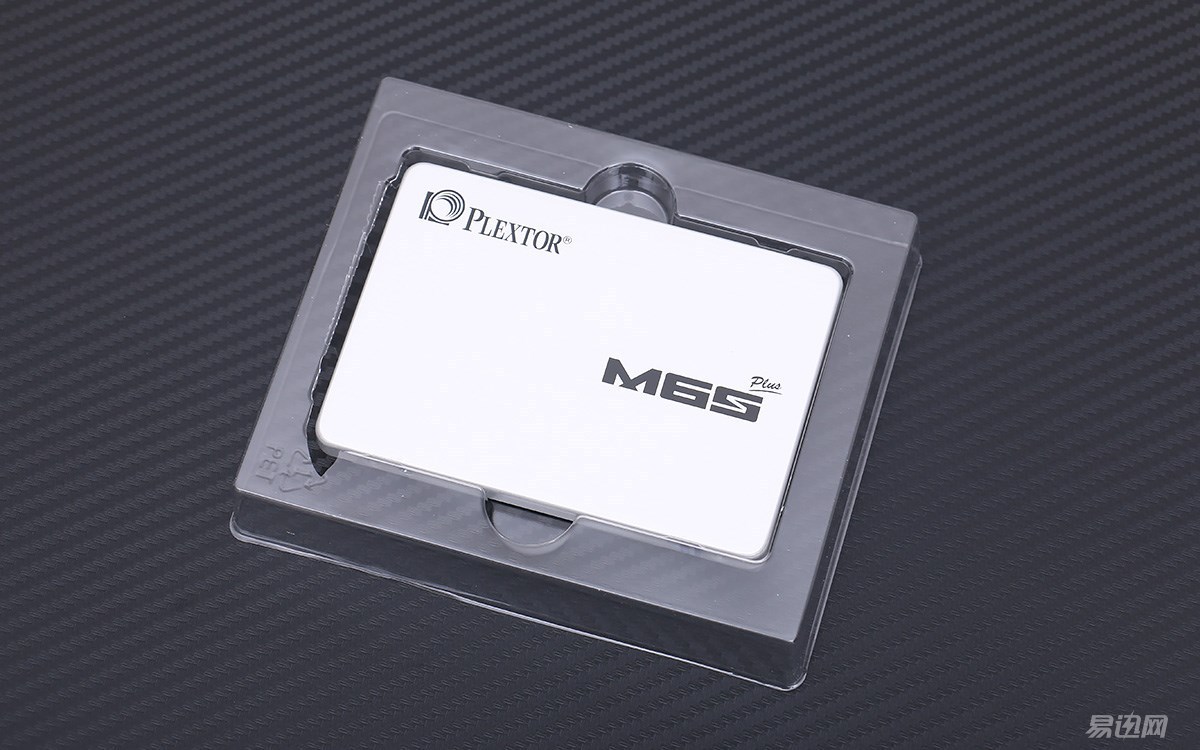
The thickness of the disc is 7mm, and the material of the shell is no different from the predecessor M6S. It is also the metal cover and the back shell. The surface of the cover has a slight matte and brushed texture, which can prevent fingerprints.
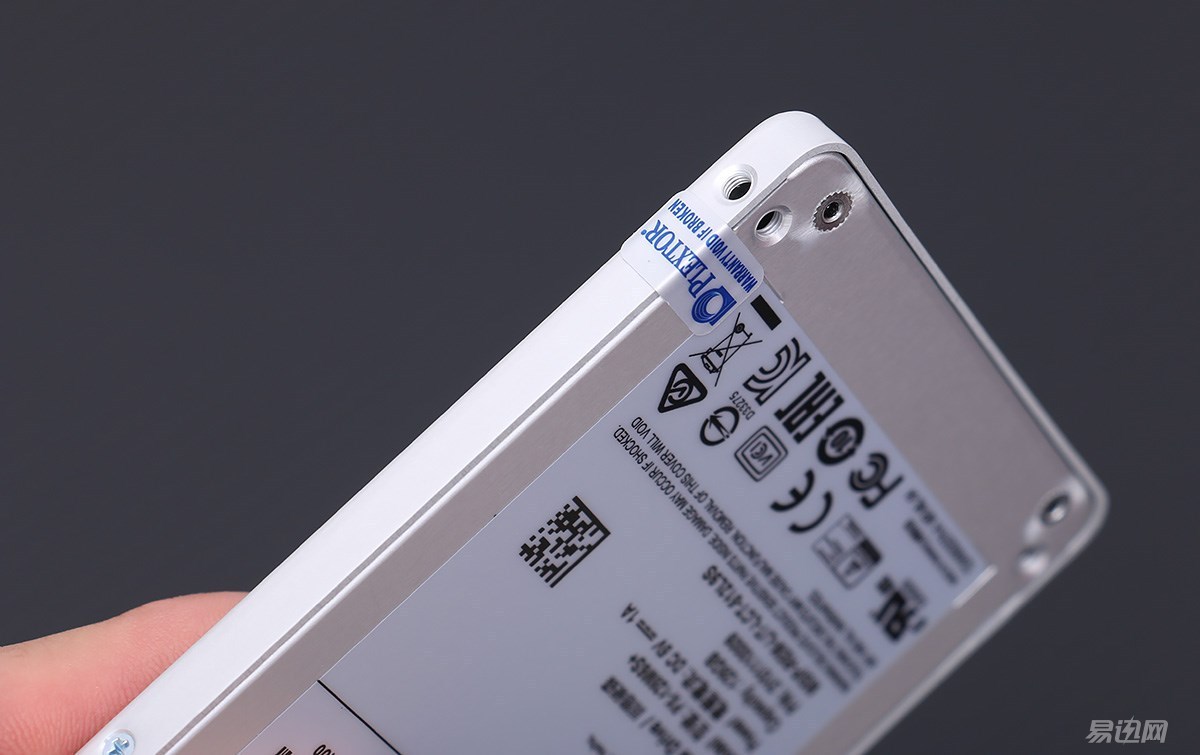
It was not easy to restore the label before the test, so this time I stopped my evil hand.
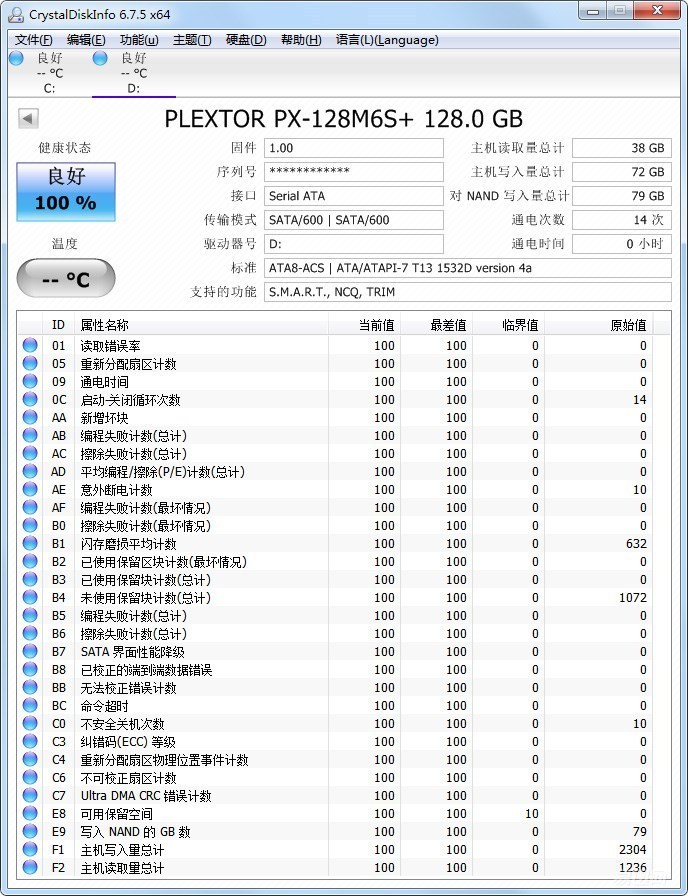
Before my relatives installed the machine and tested it on my computer, Plextor’s solid-state disk did not seem to see the temperature, and the power-on time was timed according to the IO operation time, so seeing the power-on time as 0 did not need to panic.
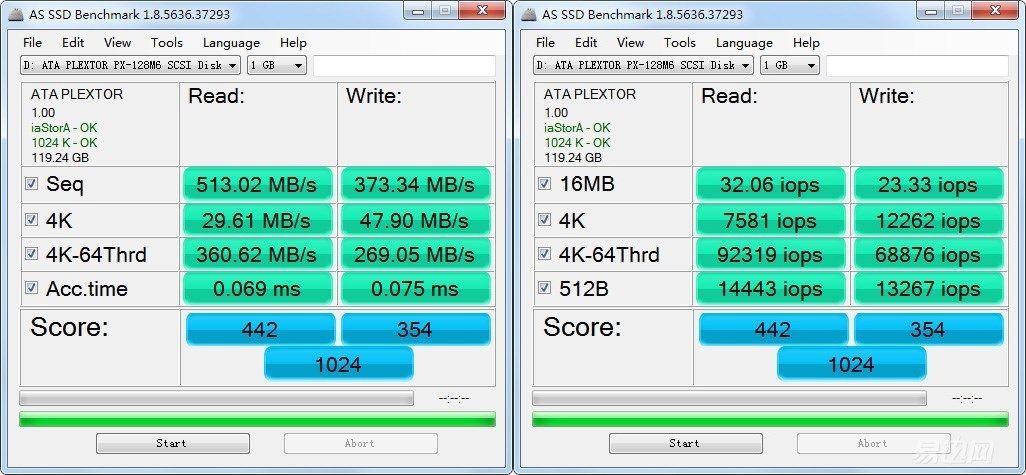
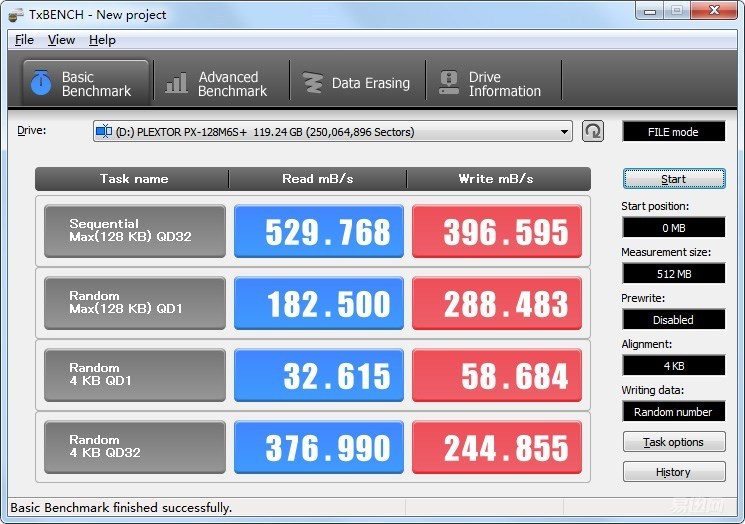
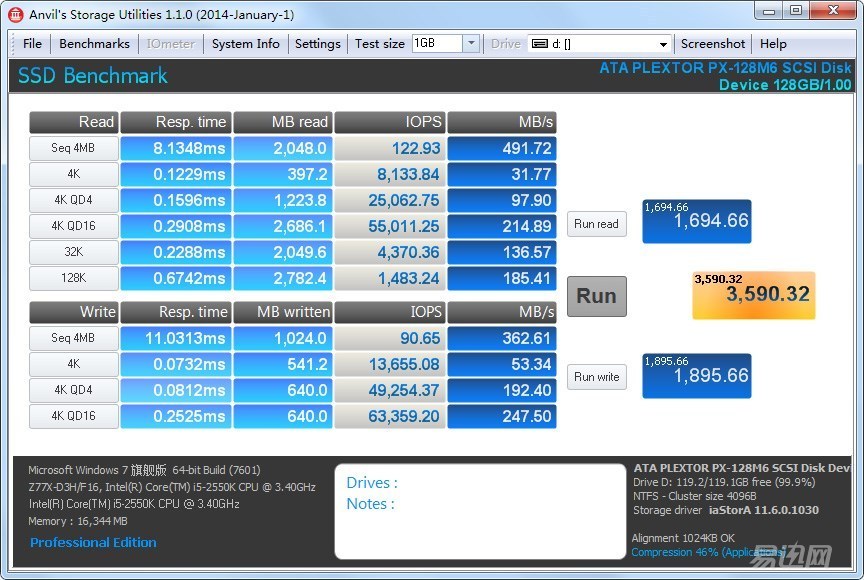
After running the test, the results are basically close to the official parameters. Of course, this has a great relationship with the test platform and software environment, so the test results are for reference only, but compared with the M6S I used before, the performance is basically the same Belongs to the same level, after all, the same control.
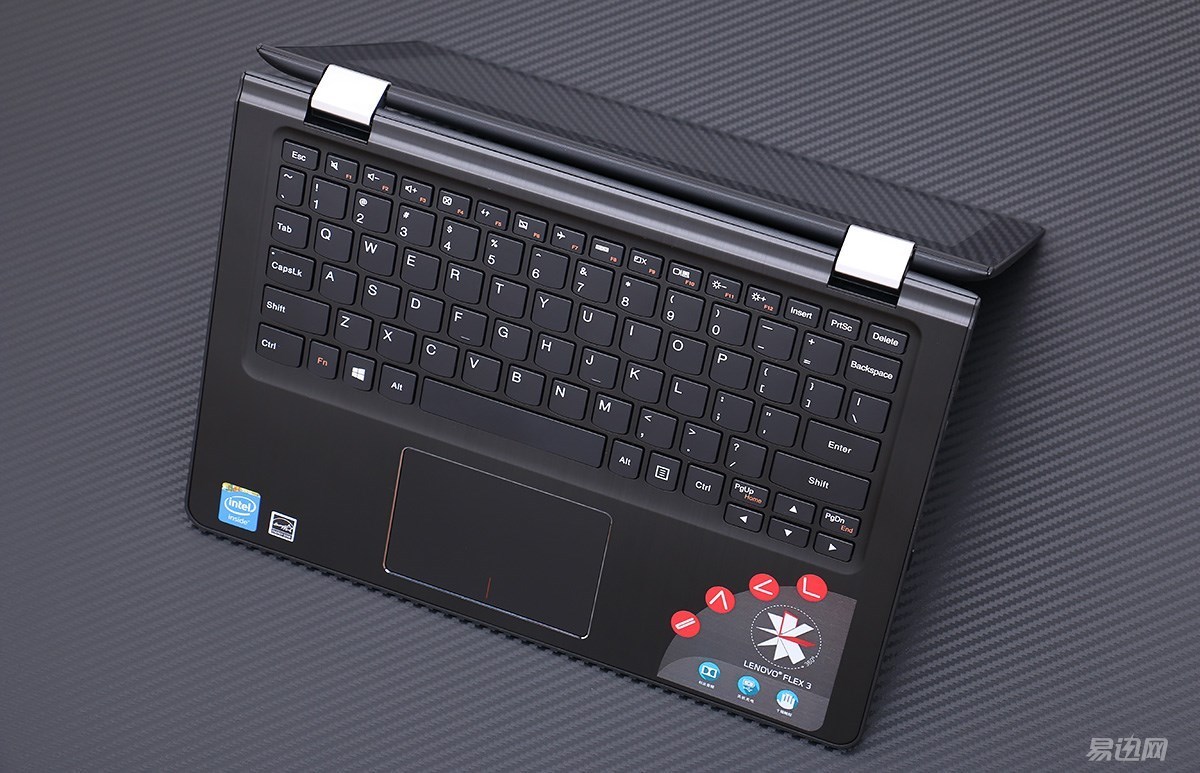
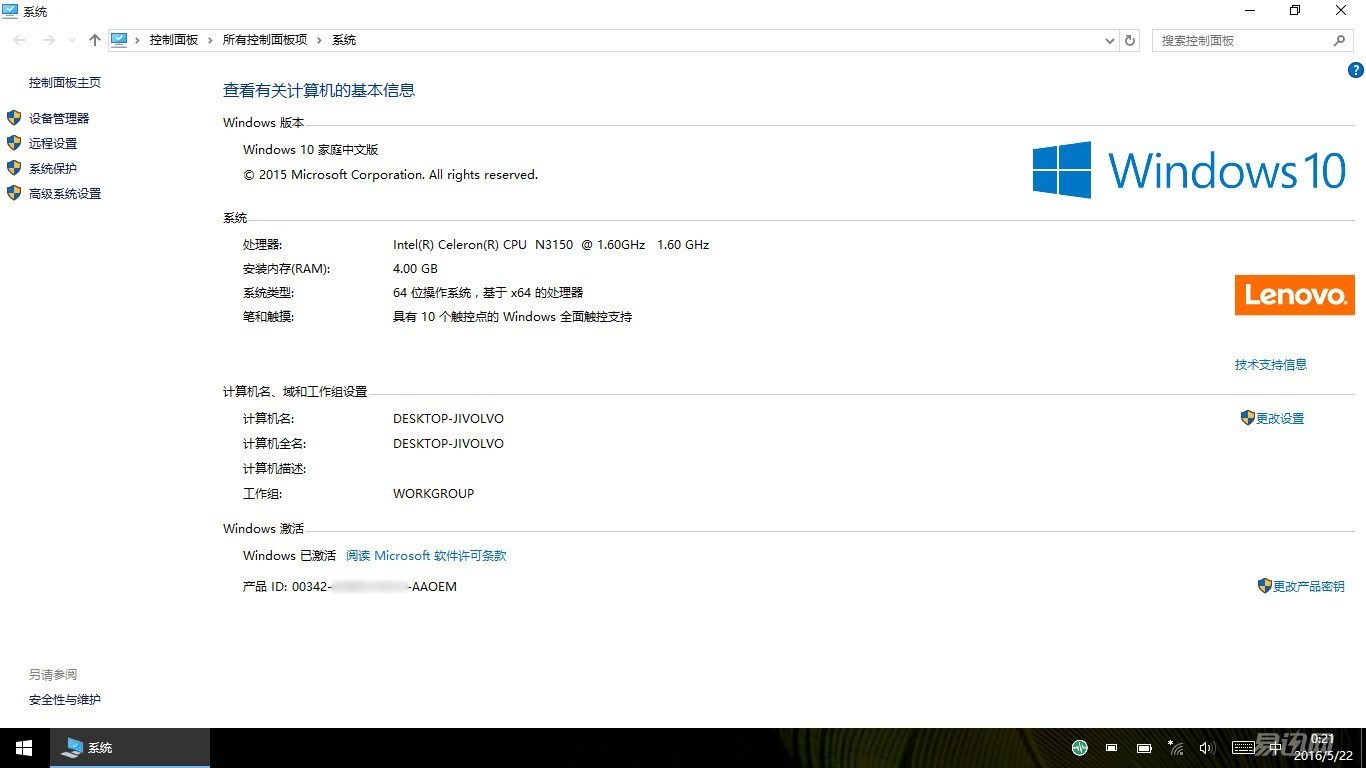
This is the Lenovo Flex 3-1130 11.6-inch variant that the relatives have just started. It supports the computer flat panel combo mode. The screen supports 10 touch points. However, in my opinion, what is the use of wood, the CPU is a four-core Celeron? N3150, with a frequency of only 1.6G, the memory is the 4G motherboard does not support the upgrade, the hard disk is a 500G mechanical disk, the card is very slow to run, and there is no mSATA or M.2 interface reserved on the motherboard, so you can only change the solid state 2.5-inch SATA SSD.
This book comes with Win10 genuine system, and relatives expressed the wish to retain the original system and the system a key to restore functions, so in order to save time, this time with Acronis True Image 2016 this software out of heaven and earth.
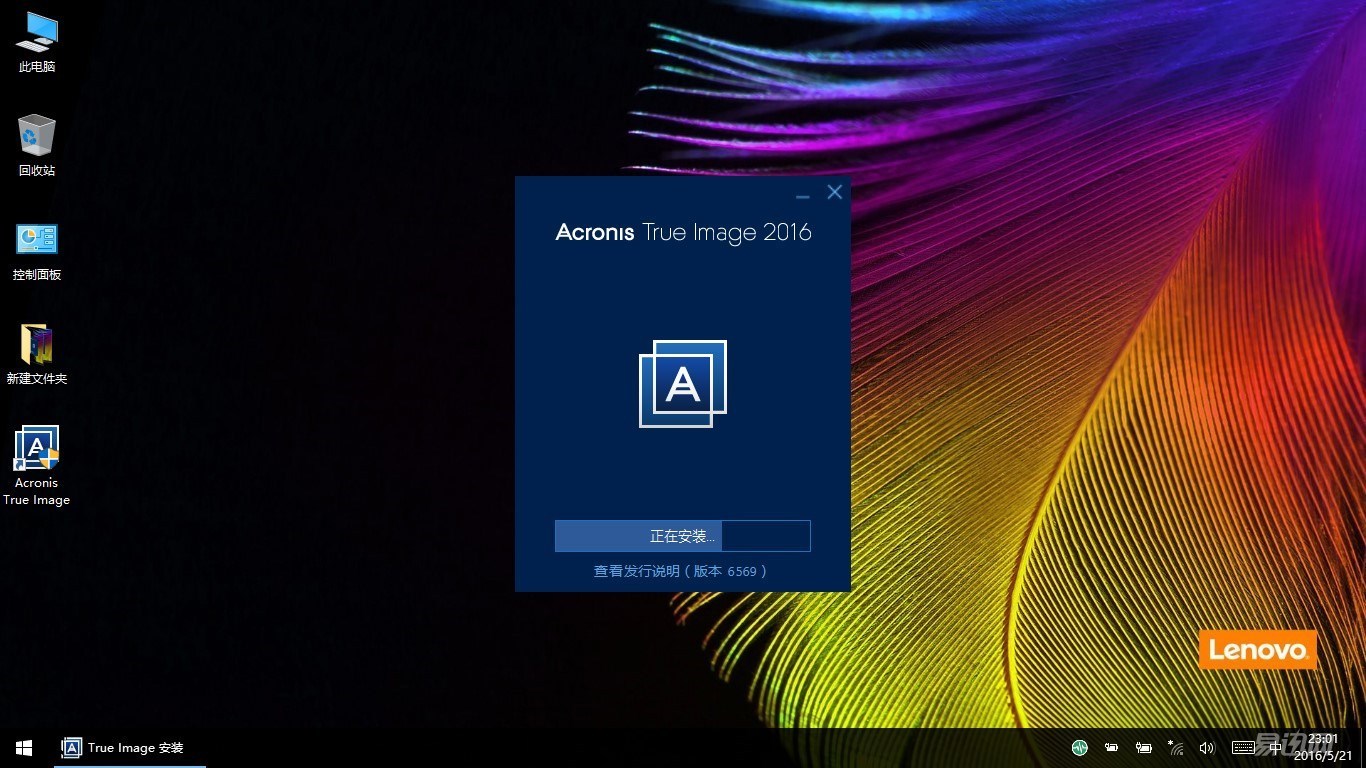
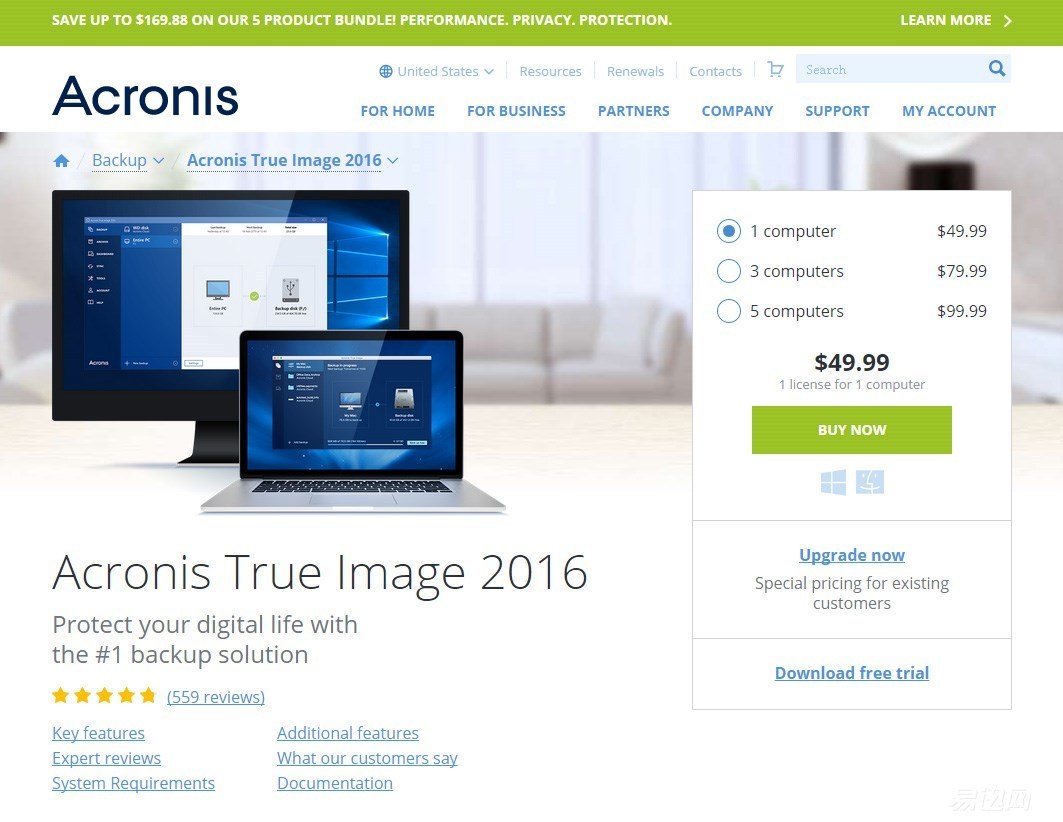
Acronis True Image 2016 is a backup and restore software that supports local backup and cloud backup. It can save entire system or single file and can be restored at any time, and here I need to use it to relocate the data of the original hard drive to the new one. Solid state drive. This software has a free trial on the official website for 30 days, but the trial version features more restrictions, and the full version can be purchased on the official website or on Duomeng to find "only for learning and communication, is strictly prohibited for commercial use, please Delete the version within 24 hours.
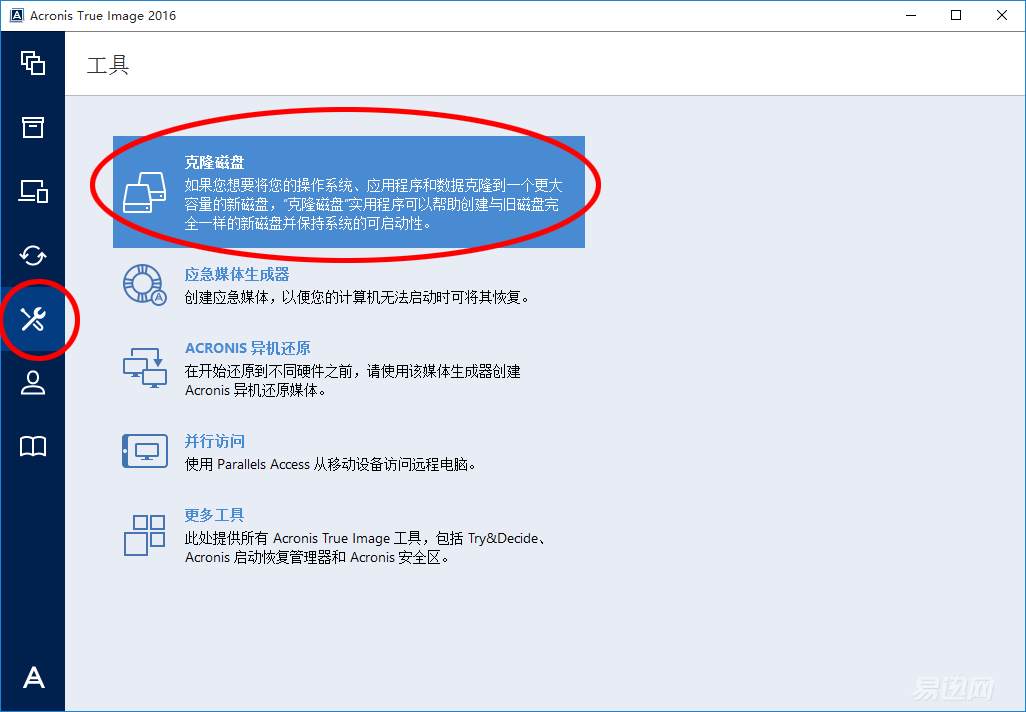
The software installation process is skipped. After installing, directly enter the "clone hard disk" option. Speaking of this software, I believe many people will compare it with our more familiar Ghost. Personally feel that this is easier and more intuitive to use than Ghost. And it's fast.
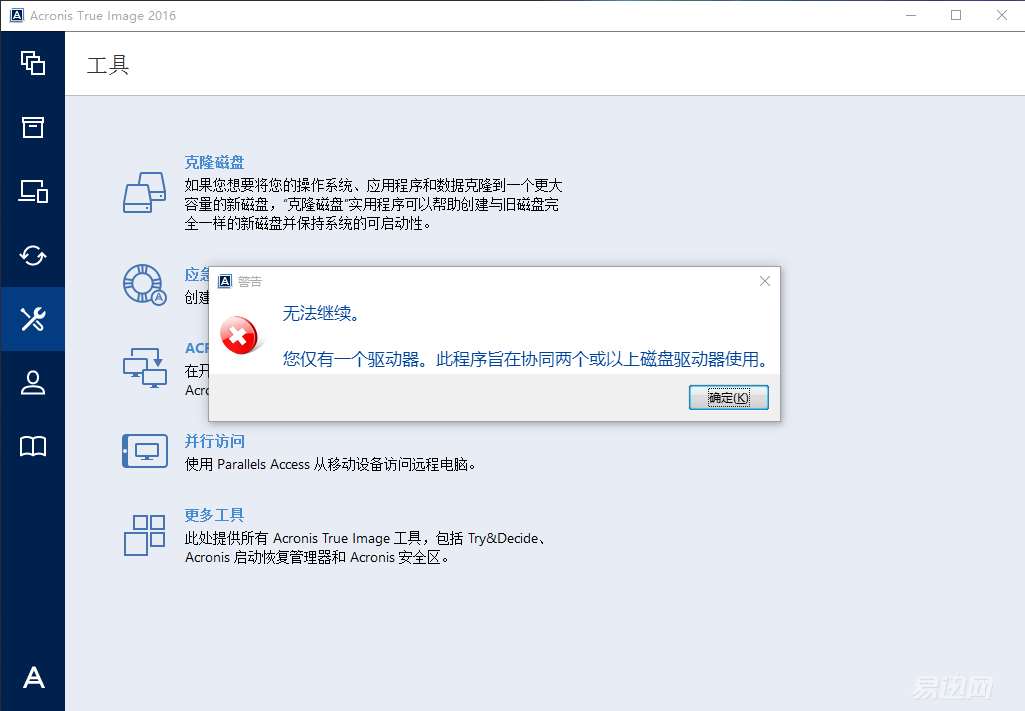
Because you forgot to insert a new hard disk, the software will not be able to continue to prompt.
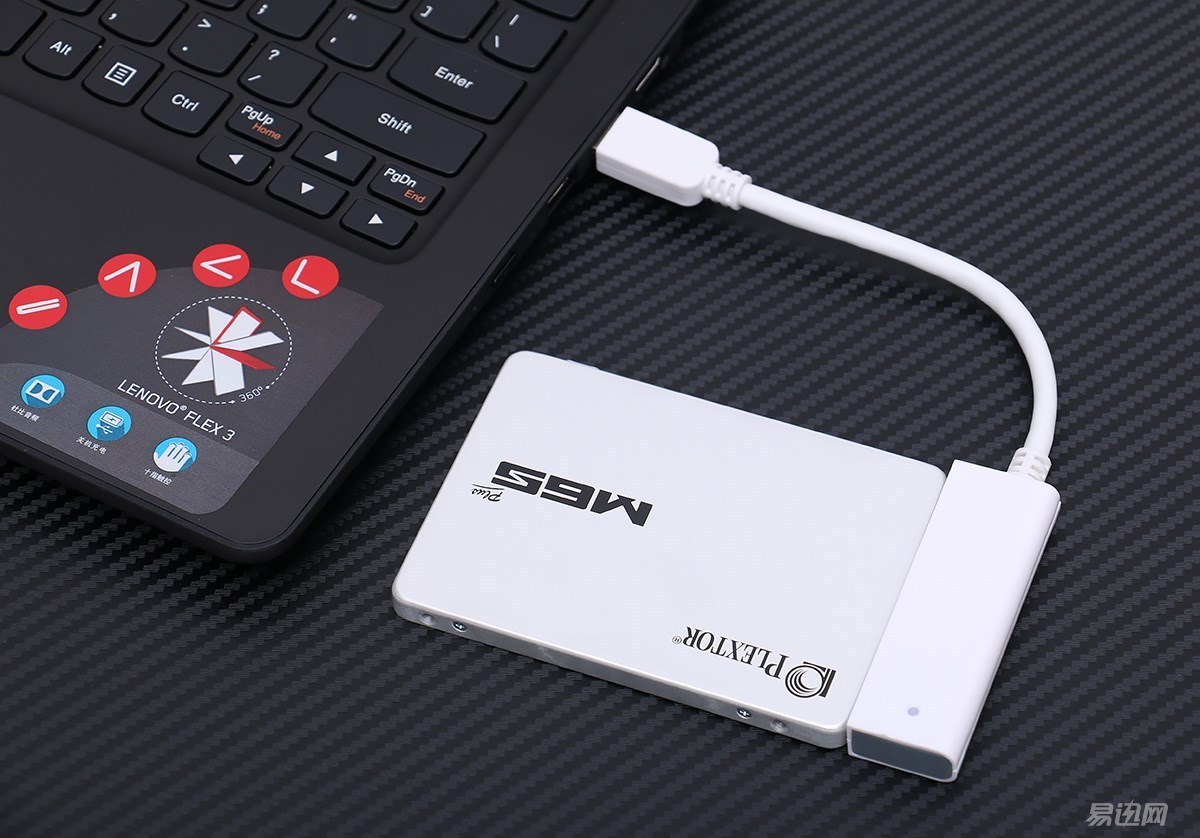
Next, use Easy Drive to connect the new SSD to the computer's USB port and click Clone Hard Drive again. Easy drive line is similar to the principle of mobile hard disk drive box, but it is more convenient than the hard drive box toss, we have the need to choose easy to drive line or mobile hard disk box. Saying that this easy-to-drive line is divided into two different USB 2.0 and USB 3.0 transmission specifications, the interface is connected to the hard disk drive is also connected, we should pay attention to distinguish between the purchase, in addition, the price of this thing from a dozen to hundreds of pieces Ranging from before, used a bargain from a seller, often there is no initialization of the hard disk, so it is recommended that you choose to buy a big brand.
Then continue to "clone hard disk", saying that this clone mode has two kinds of automatic and manual, automatic mode is the simplest, choose this mode will automatically adjust the partition according to the size of the new hard drive, without user intervention, suitable for users who do not require the size of the partition .
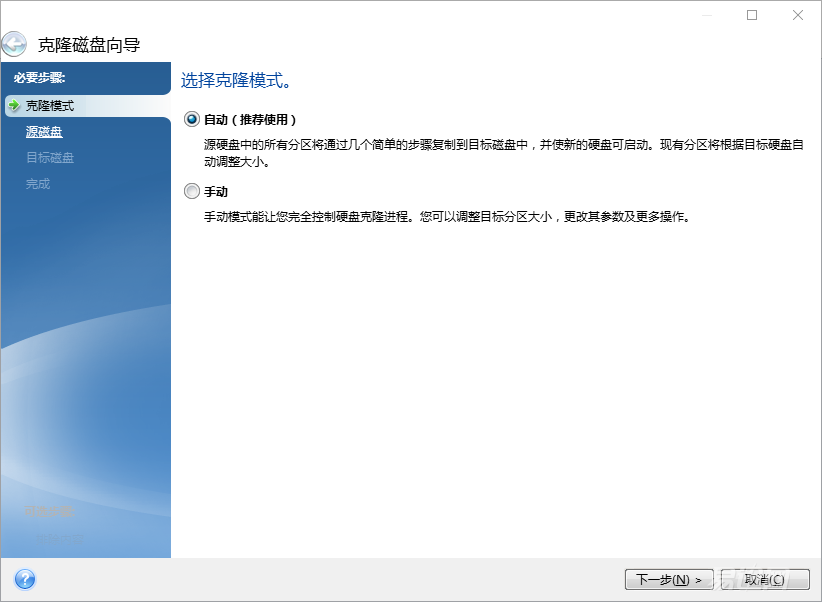
After selecting the automatic mode, you need to select the source disk and the target disk to be cloned. The source disk is the hard disk that needs to be copied, and the target disk is the new hard disk. Don't choose the wrong one, otherwise...
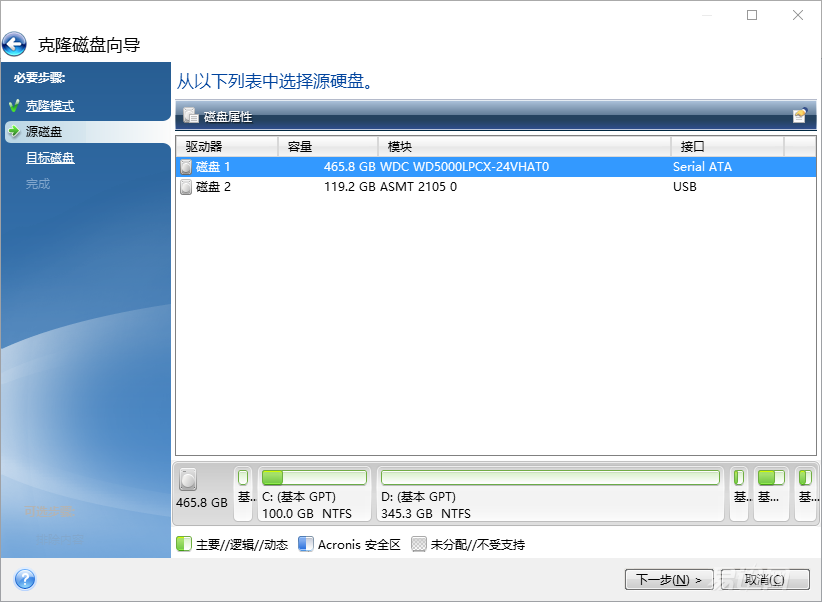
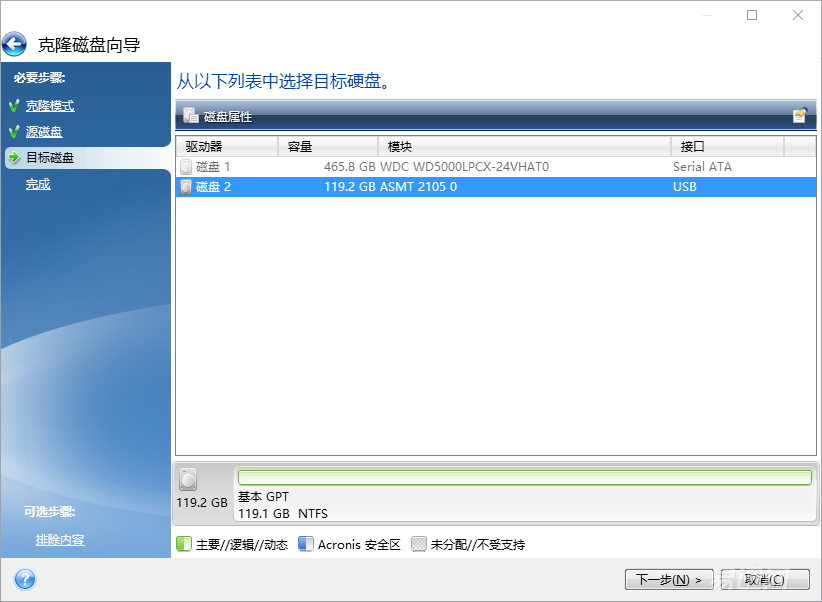
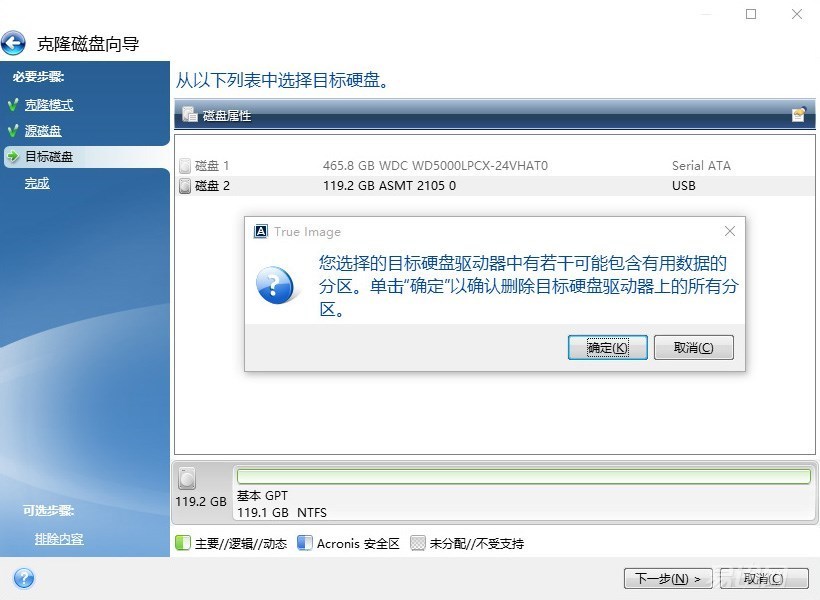
After selecting the source disk and the target disk, the software will prompt this operation to clear the data on the target disk. If there is no problem, click OK to proceed to the next step.
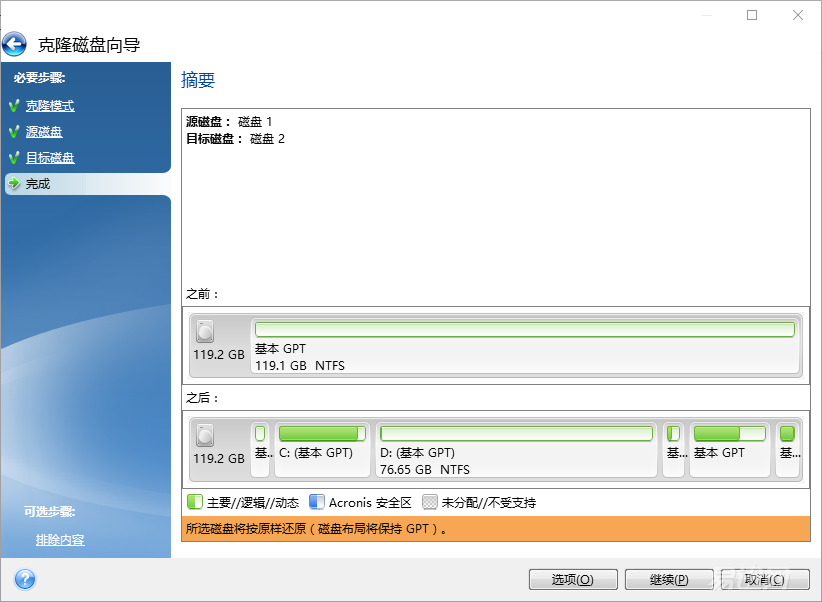
The last step will display the final partition of the target disk and the disk usage. If there is no problem, the point "continues" and the clone can be started. However, since this time the 500G disk is cloned into the 128G solid-state disk, it is automatically used. In mode, the C drive space is too tight, so here I click Cancel to return and reselect "Manual mode".
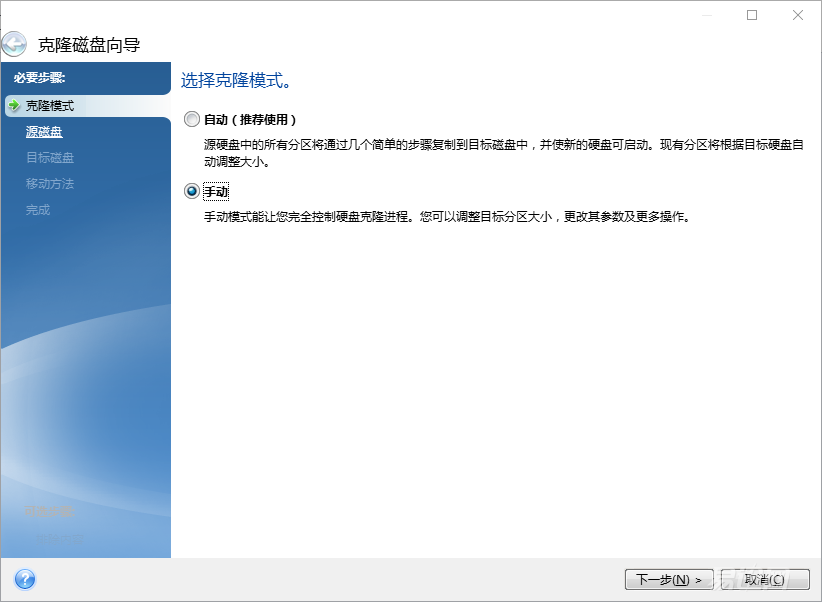
In the manual mode also need to select the source disk and the target disk, here is not tired, and here you can choose to manually adjust the partition size, which is what I want.
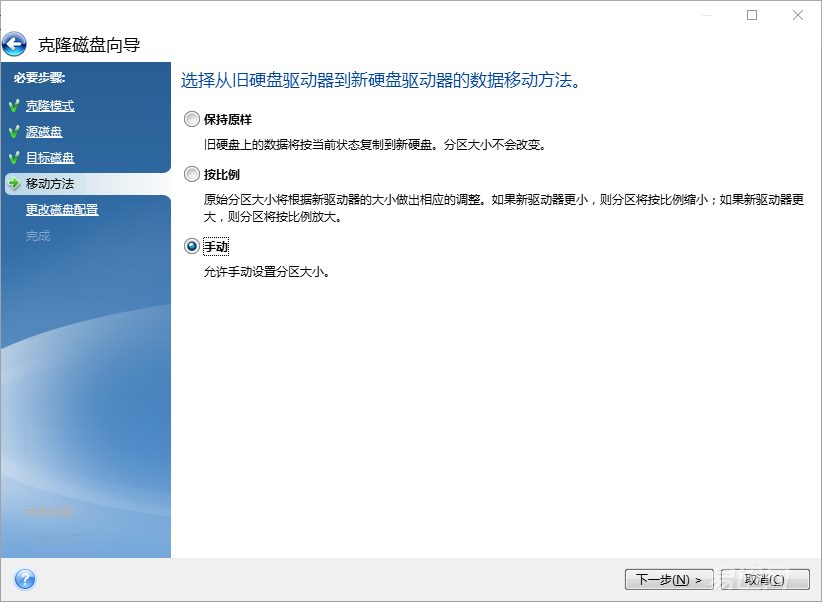
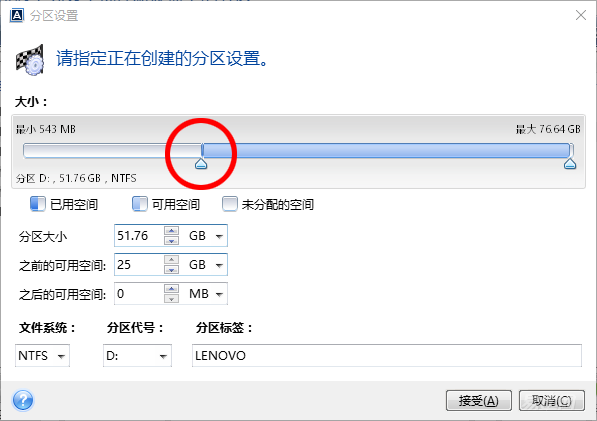
As far as the current state of the partition is concerned, the D drive has enough space for the expansion of the C drive, so here double-click the D drive and enter the designated partition.
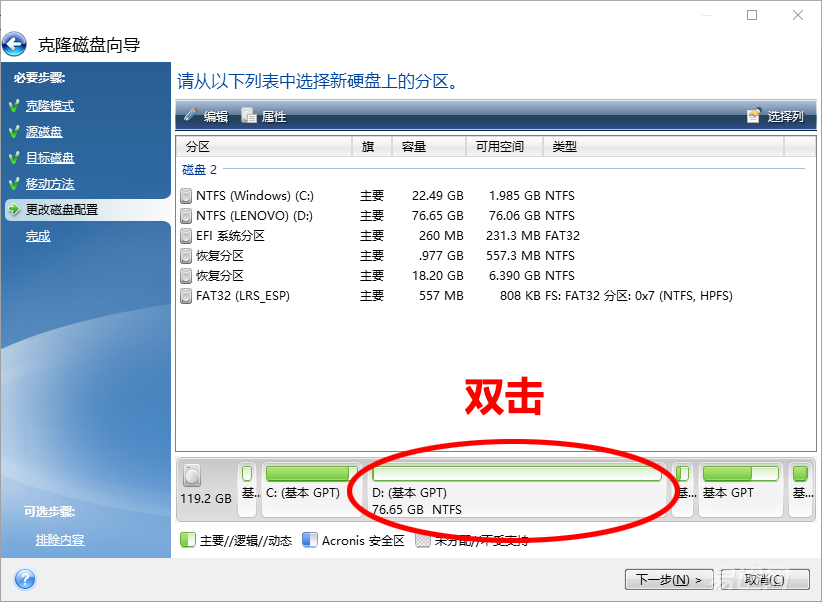
Dragging the triangle on the partition capacity diagram here can resize the D drive. Since I need to allocate more capacity to the C drive, I have 25 G space in front of the D drive.

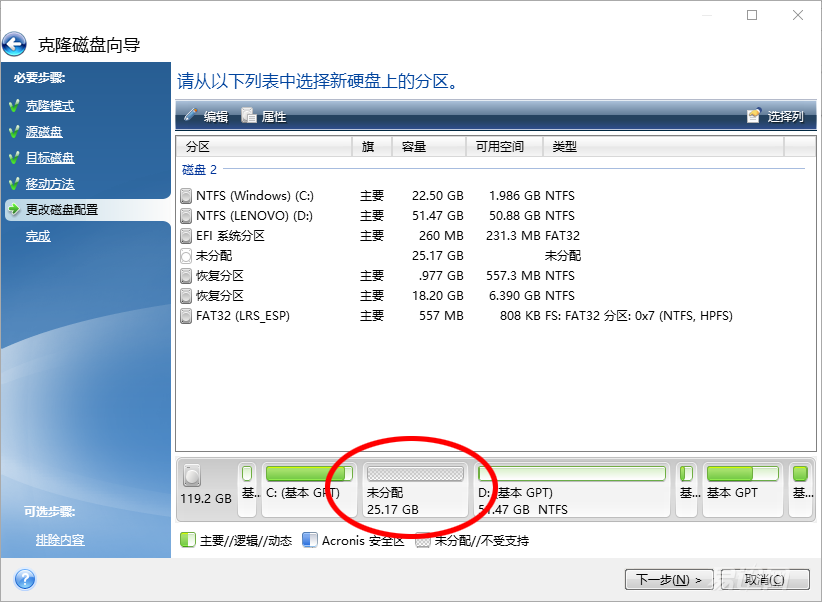
After the above settings are correct, there is a 25G unallocated space between the C drive and the D drive.
Then double-click the C drive and drag the triangle to the far right to completely divide the previously allocated unallocated space into the C drive.
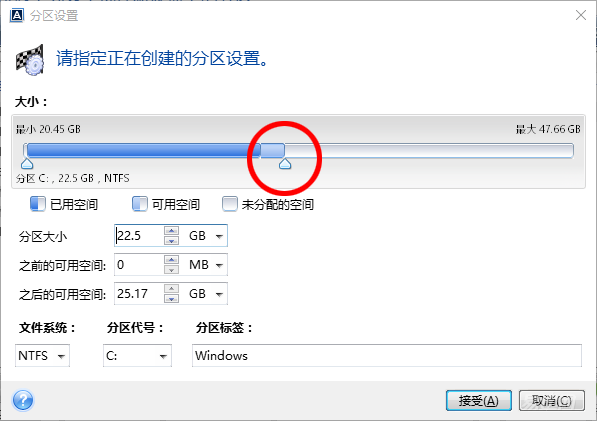
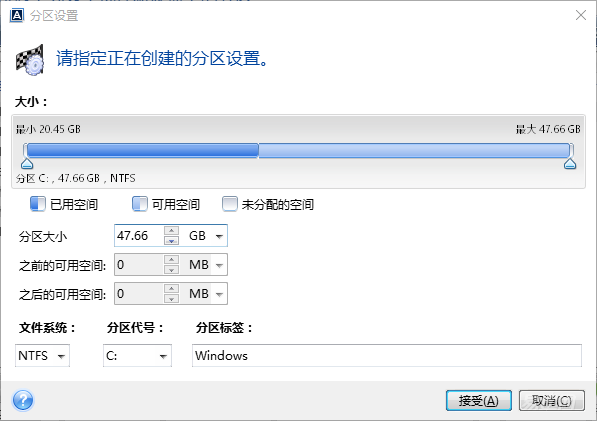
Well, after setting up, this looks much better. If you think that the 128G SSD does not need to be divided into two zones, you can fully integrate the capacity of the D drive into the C drive after you restore the system.
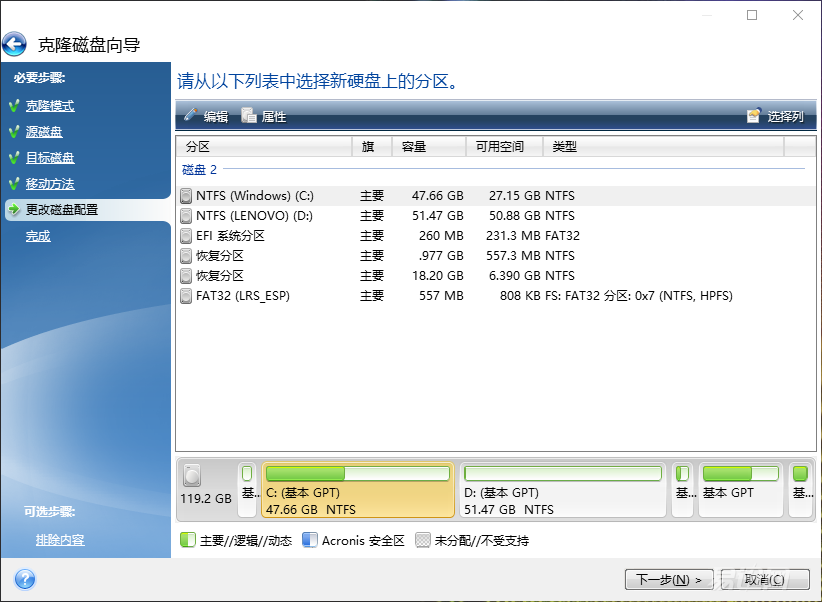
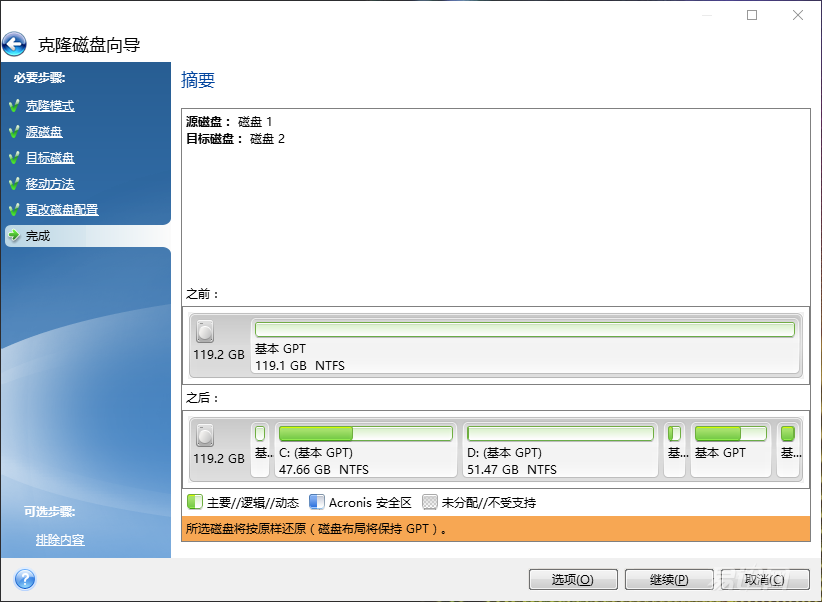
The last step requires the user to make a final confirmation based on the partition status. If there is no problem, please click “Continueâ€.
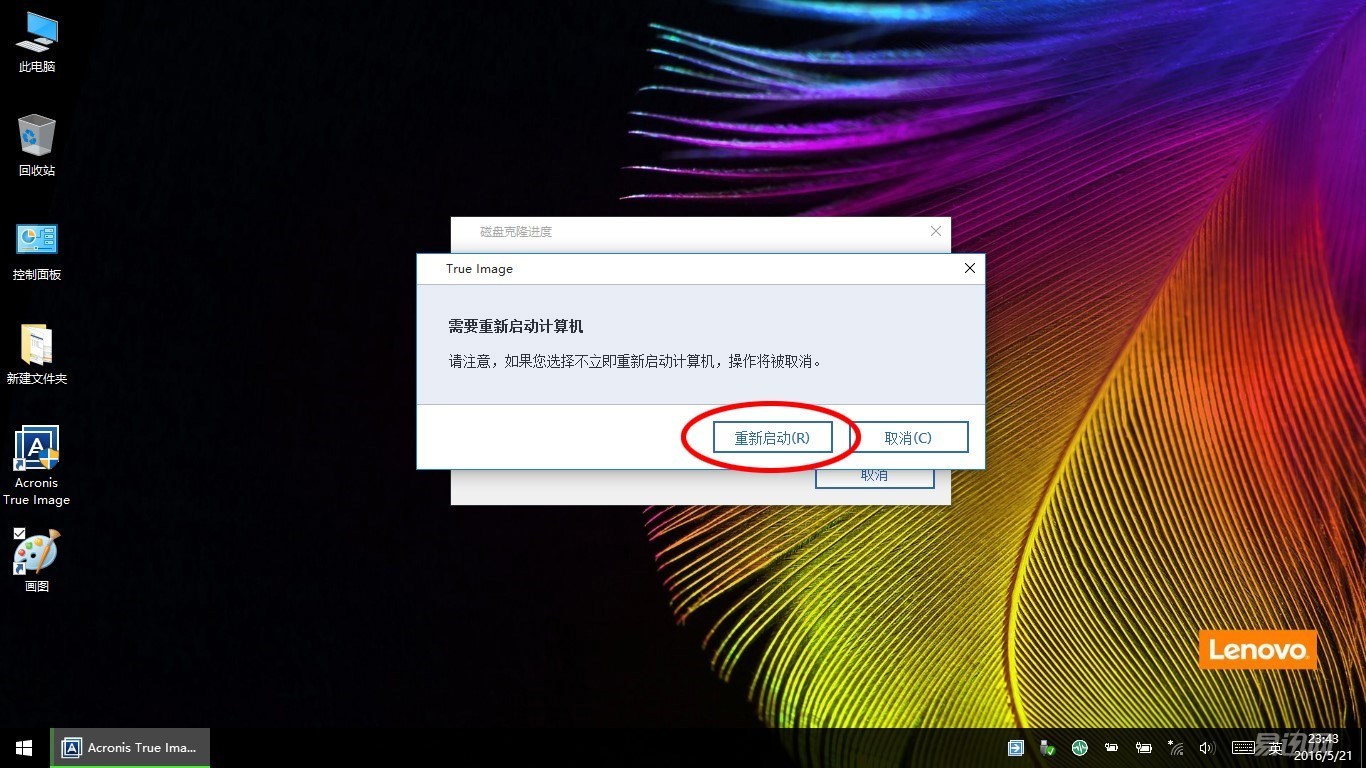
The next operation needs to be restarted.
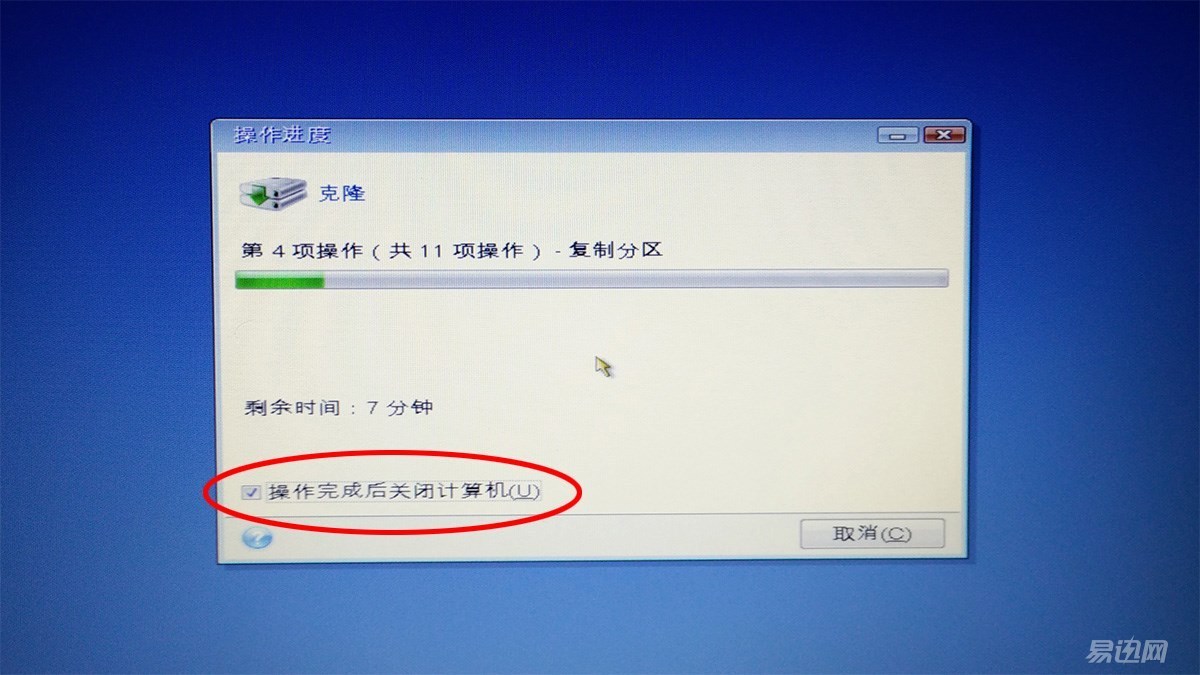
After the restart, the source disk is locked and the process of cloning the hard disk begins. The automatic shutdown option is selected by default. The remaining time on the interface is different from the actual time. It is expected that the entire cloning process will take 9 minutes, but the actual time It took 20 minutes, but it still feels pretty fast.
After the cloning is completed, the computer automatically shuts down. The next step is to replace the original mechanical disk with the new solid-state disk. The teardown process is not burdensome. The D-shell screws are all unloaded and the CD shell can be separated along the edge. It's difficult to speak of.
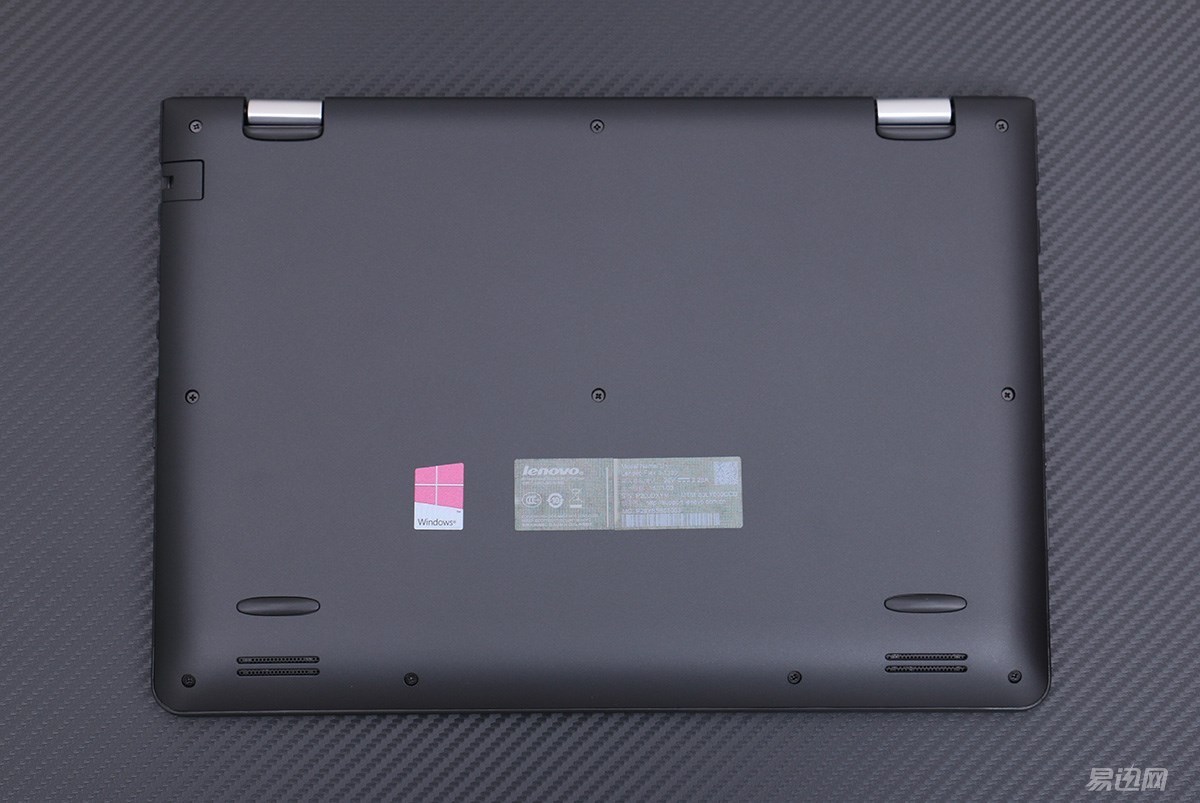
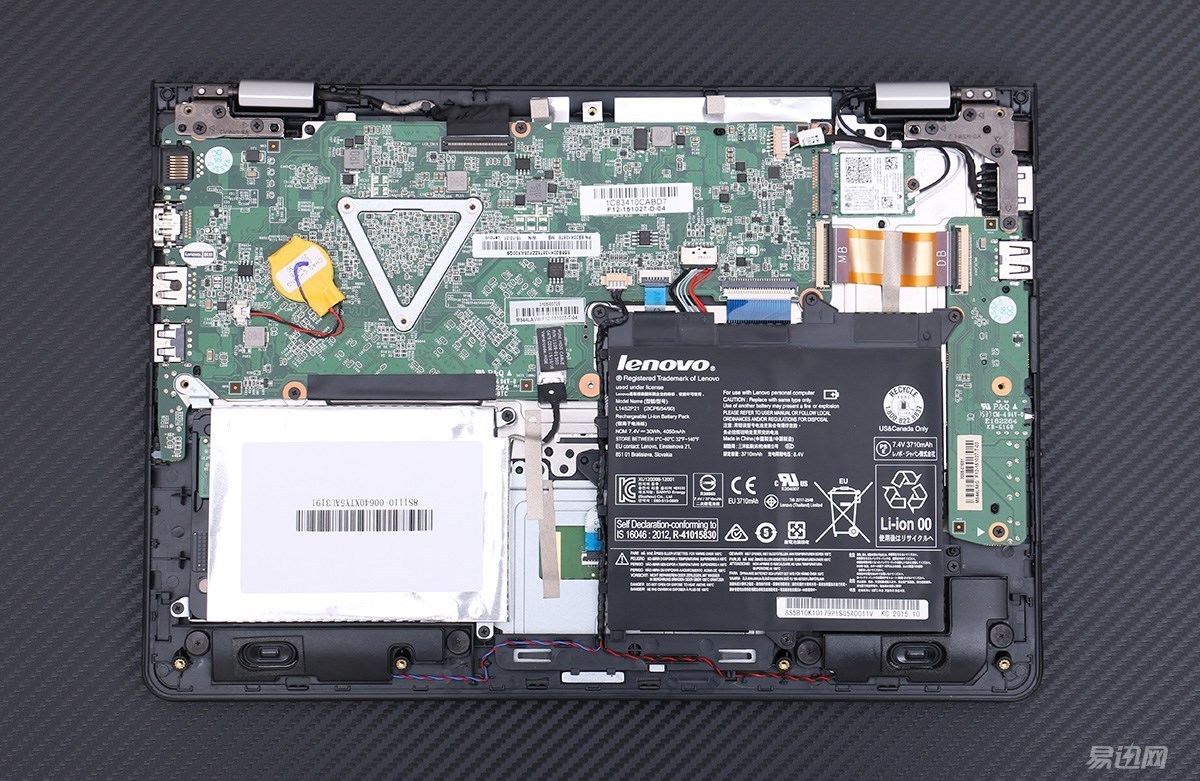
As you can see from the picture, there are no shock protection measures for the location of the hard disk, so changing the solid state will not only be faster, but it will not be necessary to use a computer at all times.

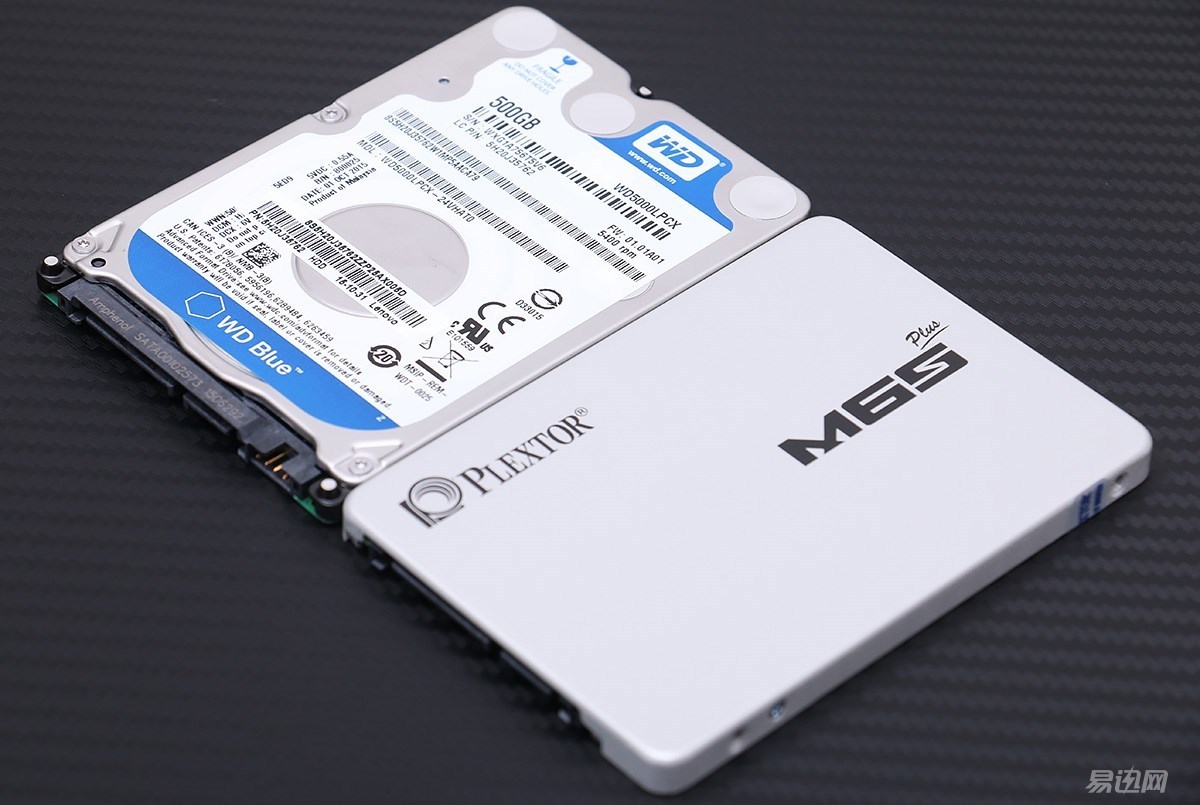
The machine's original Western Digital 500G blue disk and the upcoming Plextor M6S Plus 128G are also 7mm thick, and they are fully compatible.

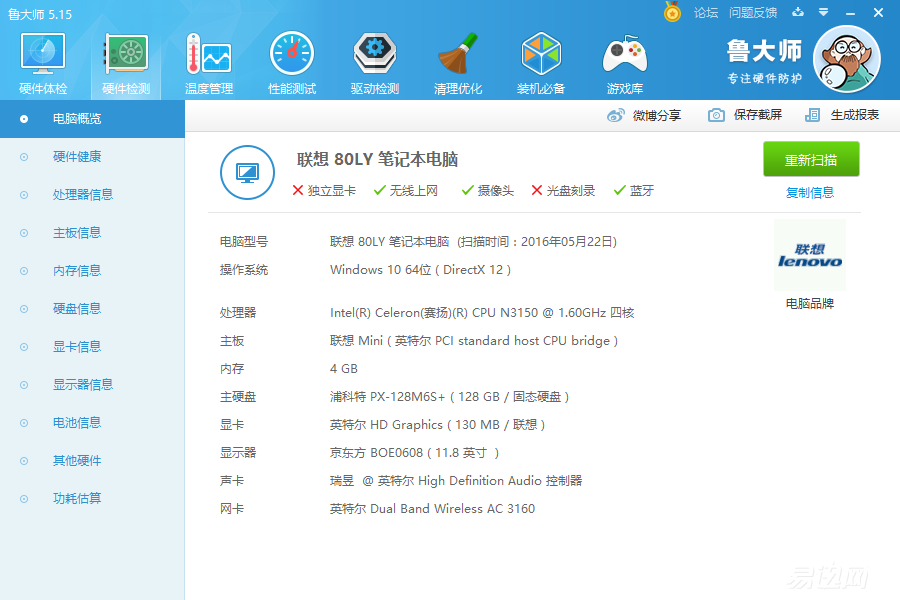
Put on the new SSD and boot directly into the system. Everything is OK and all hardware is properly recognized.
Into the Disk Manager visible in addition to the C drive and the D drive, the recovery partition, and so all in the same, consistent with the original hard drive, PO owners also specifically tried to bring their own system, a key recovery function, everything is normal, can be restored to a new system .

After the cloned system is activated, there is no problem at all. After the boot is automatically activated, the fluency of the whole SSD is greatly improved, and the relatives are satisfied. The removed 500G hard disk will be installed in the mobile hard disk box and continue to serve. This time, the original The legitimate system is completely successful.
Compared to installing a brand-new system, using Acronis True Image software to clone the original system is relatively simpler and faster, especially for users with original genuine system complexes, the old system and files can be completely migrated to the new hard disk. The key recovery function will not be lost, and the seamless transition of mechanical hard disk replacement SSDs will be completely realized. It is undoubtedly a great temptation for users who are currently on the sidelines to replace solid-state hard disks.